
Which camera settings work best on the iPhone 15

If you use an iPhone 151, this guide will tell you which settings to use to capture the best photos. If, on the other hand, you’re interested only in timelapses, read this guide.
⦿ Configure Settings > Camera > Record Video this way2:

⦿ Configure Settings > Camera > Record Slo-mo this way3:

⦿ Configure Settings > Camera > Record Cinematic this way:

⦿ Configure Settings > Camera > Formats this way4:
⦿ Configure Settings > Camera > Preserve Settings this way5:

⦿ Configure Settings > Camera this way6:

Now that you’ve adjusted the settings in the iPhone Settings app, let’s see see what options to choose while using the camera app:
In the camera app
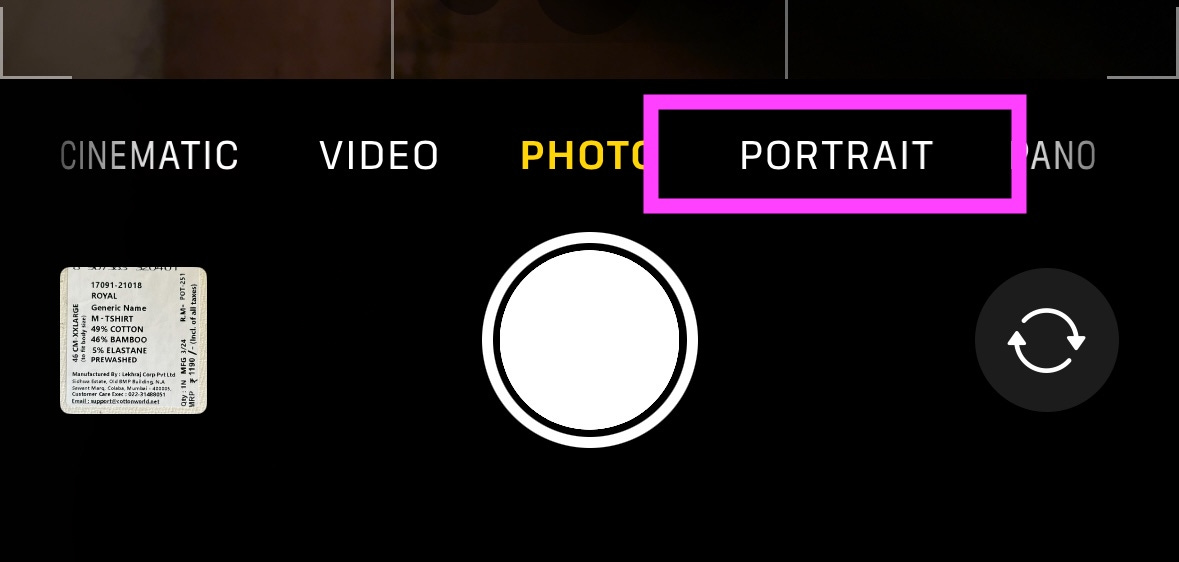
⦿ When photographing a person or statue, use Portrait mode7:
⦿ When taking a photo, use the following settings8:

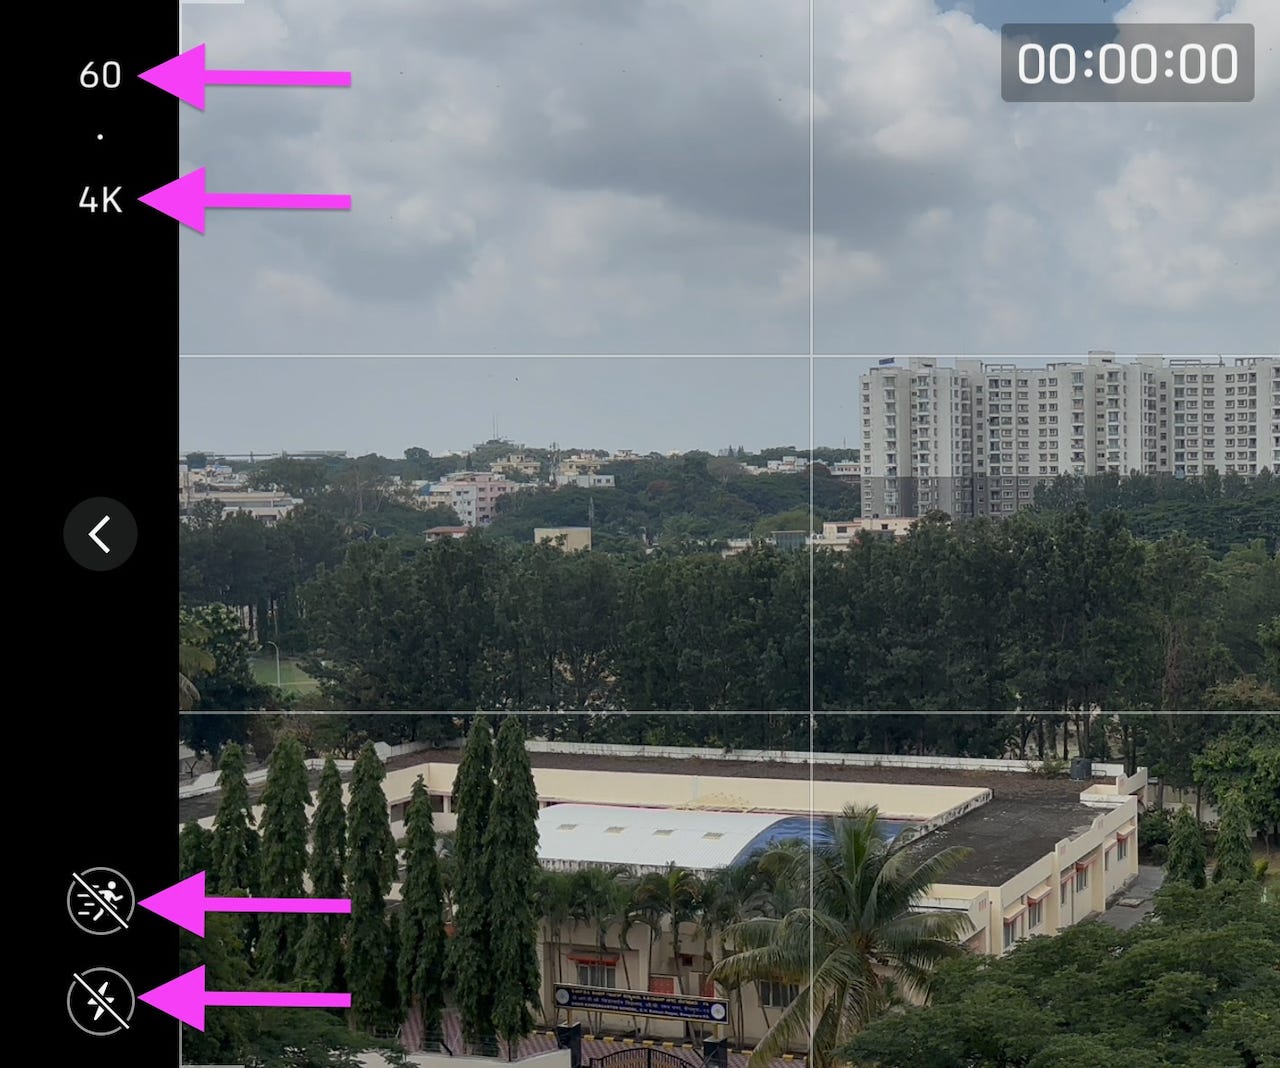
⦿ When capturing a video, use the following settings:
⦿ When capturing a video while jogging or doing other sports, use Action Mode9.
⦿ When capturing a video whose primary subjects are humans, use cinematic mode, and configure it as follows:

⦿ When capturing a timelapse, switch to the 0.5x lens10.
⦿ When capturing a panorama, use the 1x lens11.
The Pro has additional settings, which I didn’t get to test, since I don’t own it. This guide also assumes you’re using the built-in camera app.
60 FPS is the most important setting in this screen, resulting in smooth videos as you pan.
Enhanced stabilisation also contributes to smooth videos.
You want 4K for clarity.
Show PAL Formats simply shows alternative frame rates like 50. There’s no reason to capture at 50 when you can capture at 60 FPS for smoother video.
Action Mode Lower Light brightens videos that would otherwise be so dark that you see little.
HDR Video is a huge improvement in quality.
Auto FPS off captures dark scenes accurately (rather than brightening them to the point where they don’t like the scene looked to the eye) with less ISO noise and fewer artifacts.
You don’t want to Lock Camera, because you might start recording at 0.5x and partway through the video, switch to 1x, at which point you want the phone to switch to the 1x camera for better quality than cropping the 0.5x.
You don’t want to Lock White Balance, because you might start recording indoor and partway through the video, move outdoors. If you were to Lock White Balance, the colors will be off in the second half of the video.
It shows movements like water falling and rotating better, and the image quality is the same.
High efficiency uses HEVC and HEIC to reduce storage usage without hurting quality.
48 MP photos are better than 24, which are better than 12. At 48 MP, I can see that the roof of a distant mall has 4 dish antennas. Besides, when capturing a landscape in daytime, at 12 and 24, it appears dark, which is obviously not how it is in real life. (Not as dark as RAW, though.) As another example, at 24, a hint of yellow light appears that wasn’t in the scene, while 48 MP was truer to life. Apple uses a lot of algorithms on photos, which can make it look artificial. These algorithms are toned down at 48 MP, resulting in more natural-looking photos.
To take 48 MP photos, Resolution Control must be on.
Photo Mode offers choices of 12 and 24. This setting determines which resolution will be used when you’re not capturing at 48 MP, say when you’re capturing a Live Photo, which doesn’t 48. Set it to 24, since it’s better than 12.
The way this screen works is that whichever settings are on, when you open the camera app, it will use the same settings you had used the last time. Whichever settings are off in this screen, the app will revert to the default next time you open the app.
In the above screenshot, you can see that preservation of Creative Controls is off. So if you change the aspect ratio for a specific photo that needs it, and open the camera app after a few days to shoot a different scene, it will reset it to the default aspect ratio, rather than applying the earlier used aspect ratio to a scene for which it doesn’t look good.
Preservation of Depth Control is on. Now, you can open the camera app and set the aperture wider than the default F4.5, which doesn’t blur the background enough. Say you set it to F1.8. The next time you open the app, it will remain at F1.8.
Preservation of Exposure Adjustment is off since if I increase exposure for a specific photo that needs it, I don’t want subsequent photos to be overexposed and ruined because I forgot to reset this setting.
Preservation of Night Mode is on. That way, in the Camera app, I can turn it off and it stays off. Why do I turn it off? Because it often turns night into day. It blows out highlights, making a distant apartment look eye-searingly bright, which it's not. Zoomed in, photos look like watercolor, which they don't with night mode off. The photos can also look artificial. On the other hand, night mode can pull out beautiful hues and details from the sky. Use night mode only when it’s really dark, for example if you’re in a room with all the lights in your house off and you want to capture the distant city lights through a floor-to-ceiling window. That’s why you don’t want it to automatically trigger.
Preservation of Portrait Zoom is off. Since digital zoom reduces quality, I don’t want it to linger from the last session.
Preservation of Action Mode is off, since it’s a mode that should be used only when you’re recording video while jogging (or participating in other types of sports). Since I hardly do that, I want to ensure that Action Mode is off when I open the Camera app, even if I used it yesterday, so that it doesn’t accidentally record in Action Mode.
Preservation of Resolution Control is on because otherwise the camera can capture in 12 or 24 MP, which I don’t want. See footnote 4.
Preservation of Live Photo is on because I want to turn it off and have it stay off. This is because Live Photo is not compatible with 48 MP, and I want 48 MP photos. (Live Photos by itself is good — it doesn’t degrade quality as it used to in earlier years. In fact, clouds have more detail with Live Photos on than off.)
In this screen, I’ve turned off Volume Up for Burst because it sometimes accidentally triggers when I hold the phone.
Scan QR Codes is useful, rather than having to install an app just for that.
Show Detected Text lets you copy and paste text from what you’re seeing in the viewfinder.
Grid helps you apply the rule of thirds.
Level helps you see if the phone is tilted, so that you can correct it.
Mirror Front Camera swaps left and right, the way a mirror does, so the image ends up looking like you’re used to seeing yourself. The mirroring doesn’t affect the preview — whether or not mirror is on, if you move your head to the left, the preview will show you moving your head towards the left edge of the phone, not the right.
View Outside the Frame helps composition, by seeing what you’d get if you were to switch to the 0.5x camera without having to switch to it, see the result, and switch back. When you’re learning any skill, be it photography or coding, shortening the feedback loop helps you learn faster.
Portraits in Photo Mode: When photographing a person or a statue, use portrait mode. The beautiful background defocus makes the subject stand out. But you may forget to switch to portrait mode in the heat of the moment. This setting helps you out, letting you enable portrait mode in post.
Prioritise Faster Shooting increases the burst rate to address a common problem with burst: if you’re photographing a tennis match, you often end up with a photo of the ball far before it hits the racquet, and one far after, but not the critical moment the way you see in magazines.
Lens Correction is important because smartphones are mediocre optically and require a lot of software smarts to correct.
It defocuses the background beautifully, making the subject stand out.
From left to right:
Turn off the flash, since it destroys the ambience of the scene.
Turn off night mode, since you should use it only when needed, rather than automatically, as footnote 5 says.
HEIF MAX is Apple-speak for 48 MP, which results in better photos, as footnote 4 says.
When you switch to Action Mode, it switches to the 0.5x camera. Don’t override the phone’s judgment and switch back to 1x — the field of view becomes to narrow and panning becomes disorienting (as if your face is close to the ground and you’re being whipped around). This defeats the point of using Action Mode in the first place.
This is how the various video modes compare (right-click and open in a new tab if it’s too small):

When you switch to the timelapse mode, the iPhone switches to the 1x camera. Switch it back to 0.5x, since timelapses look beautiful with the ultrawide field of view, so you can see the colors in the sky change as the sun sets, the landscape in front, the road below, and the garden at the extreme bottom.
It distorts the perspective, making an apartment some distance away appear very far, which is not how it looks to the eye. This is a problem with ultrawide lenses in general.